Moving a towable lift is not just a hitch-and-go task. The trailer, tow vehicle, and lift must work as one system, from the yard gate to the final parking spot. A loose safety chain, an unsecured boom, or an overlooked tire can turn a short trip into a costly delay. Small details matter.
The Bureau of Labor Statistics reported 1,942 fatal work injuries involving transportation incidents in 2023, representing 36.8% of all fatal work injuries (Census of Fatal Occupational Injuries, 2023). That figure covers many kinds of workplace transport, not towable lifts specifically, but it underlines why checks before departure deserve attention. OSHA’s construction standard also states: “A body belt shall be worn and a lanyard attached to the boom or basket when working from an aerial lift” (29 CFR 1926.453). Follow the lift manufacturer’s transport instructions as well; tie-down points and boom-rest requirements vary by model.
So, How to transport a towable lift to a job site? Start with the machine’s manual, then verify towing capacity, hitch connection, lights, tires, and securement before moving. At the site, choose firm ground and allow room to unload and position the lift. Even an experienced crew can miss a latch when the schedule is tight. That is easy to overlook. This guide shares seven practical checks, while recognizing that conditions and equipment differ. Verify every detail against the specific lift and tow vehicle before setting out.
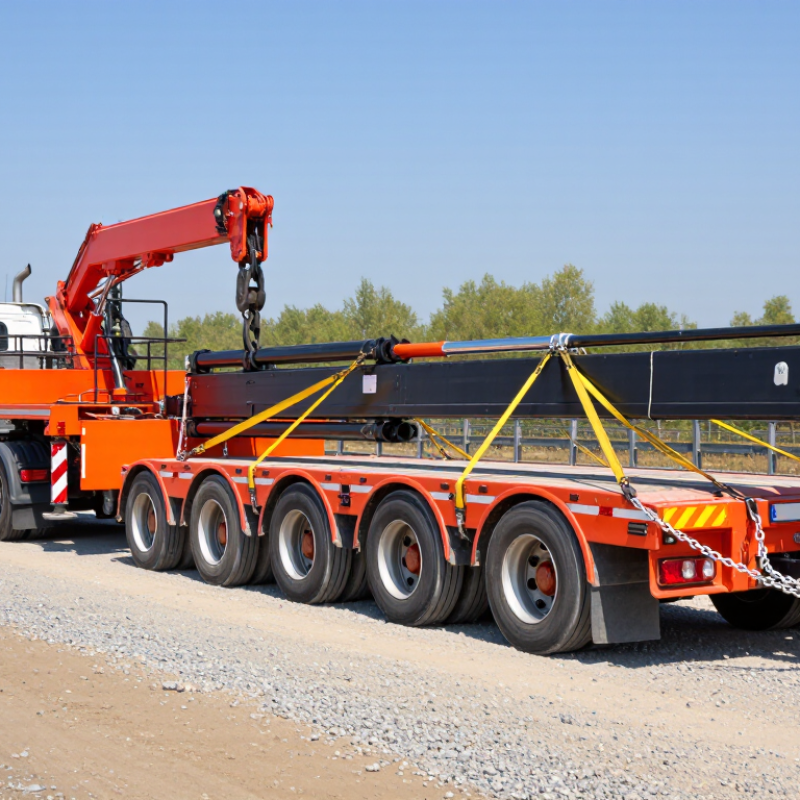
Before arranging transport, record the towable lift’s operating weight, overall length, width, and height. Check the equipment manual or data plate, since attachments and fluids can affect weight. Do not rely on a rough estimate. Small details matter. Compare the lift’s weight with the tow vehicle’s rated towing capacity, hitch rating, and permitted tongue weight. The lowest rating sets the limit. Confirm the trailer is suitable for the machine and that its brakes, tires, coupler, and safety connections are in good condition.
Dimensions shape the route as much as the load. Measure the full trailer-and-lift height, then check bridges, site entrances, overhead lines, and tight turns along the planned route. A driveway that looks wide enough from the cab may leave little room to maneuver. Verify the required hitch type and electrical connection before departure, and follow the lift and trailer manuals for loading and securement. Recheck straps and connections after a short distance, when safe to stop. Plans are rarely perfect; a last-minute route change can make careful measurements especially valuable.
Before moving a towable lift, walk around it in good light. Look for cracked welds, loose parts, damaged tires, and hydraulic leaks. Check that the platform is fully lowered and secured for travel. Test the controls only as the operating manual directs. Small defects are easier to address before the lift is on the road.
Inspect the tow vehicle’s tires, mirrors, lights, and towing capacity against the lift’s specifications. The hitch must match the required type and rating. Check the coupler for a secure fit, then confirm the locking pin is in place. Attach safety chains as directed, and connect the breakaway system if the lift has one. Test the trailer lights and brakes before departure. No shortcuts here.
Keep wheel chocks and any required protective equipment accessible, not buried under tools. I have seen people focus on the hitch and overlook a frayed chain or a dark signal light. That is an easy mistake to make, and worth catching. Use a walk-around checklist, even when the route is familiar. Recheck the coupler and connections after the lift is loaded, and pause if anything feels loose or uncertain.
Before towing, park the lift on firm, level ground and place it in its designated transport position. Retract the platform and stow loose tools so nothing can swing or fall. Check the lift manual and confirm your tow vehicle is rated for the loaded weight. Tip: Look closely at the tires. Cuts, low pressure, or a loose wheel nut deserve attention before departure.
Inspect the coupler for a secure fit, then close and lock its latch. Attach safety chains to the designated points, leaving enough slack for turns without letting them drag. Seat the electrical plug firmly. Tip: Ask someone to check the brake lights, turn signals, and running lights while you operate each control. If the lift has a braking or breakaway system, verify its connection and function as the manual directs. Small connection faults are easy to miss in bright daylight.
Before joining traffic, test the brakes at low speed in a clear area, following the equipment instructions. Stop safely after a short distance and recheck the hitch, chains, and plug. I can be tempted to skip that pause when the site is close. It is still worth the minute. Keep the lift level and drive gently over rough ground.
Before towing a lift, measure its full transport height and width, including the hitch and any secured accessories. Compare those figures with the tow vehicle’s capacity and the lift’s transport instructions. Small details matter. A folded guardrail or loose cable can change the clearance you need. Plan the route using current road information, then check bridges, tunnels, narrow lanes, low branches, and overhead obstructions along the way. Do not rely on a map’s height estimate alone; posted clearances and actual conditions may differ.
Check turning space at job-site entrances, tight intersections, and temporary detours. A wide load may need more room than the map suggests. Note steep grades, rough shoulders, and soft ground near the destination, since they can affect safe towing or unloading. Roadwork can change overnight, so confirm closures and access details close to departure. It is tempting to trust a familiar route, but familiarity can hide new hazards. I would still leave extra time to reassess rather than force a tight turn or continue toward an uncertain clearance. A quick call to the site contact can reveal blocked gates, low cables, or a safer unloading area.
Before unloading, inspect the access route and the ground where the lift will sit. Look for soft soil, loose gravel, slopes, potholes, and hidden edges near trenches. A surface that looks firm can shift under a heavy machine. Pause here. Check the lift’s operating instructions and confirm the unloading method, ramp capacity, and required towing-vehicle setup. Keep people clear of the trailer and never stand between the lift and vehicle.
Move slowly, using the designated loading or unloading controls. Keep ramps aligned and secured as instructed, and avoid sharp turns or sudden braking. If the lift begins to drift or a ramp shifts, stop and reassess instead of trying to correct it while moving. I have seen a small alignment error become a much bigger problem. No shortcuts.
Once unloaded, choose firm, level ground with enough room to extend the lift’s supports and operate safely. Check overhead clearance, nearby traffic, and the location of buried utilities before positioning it. Set the brakes and deploy stabilizers exactly as the manufacturer specifies. If the ground feels spongy or a support starts sinking, relocate the lift or use an approved ground-protection method. Recheck the setup before raising the platform; a quick glance is useful, but it is not a full inspection.
Use this checklist as a planning aid. Follow the lift and trailer manufacturers’ instructions; unloading and stabilization procedures vary by model and site conditions.
Checklist focus: Park on firm, level ground away from traffic and overhead hazards; secure the tow vehicle and keep bystanders clear. Unload slowly using the method specified in the equipment manual. Before operation, check that the lift is on firm, stable ground, inspect for voids or weak surfaces, and deploy stabilizers as directed.
Bars show the number of practical reminders included for each stage—not measured performance data or a substitute for the operator’s manual.
Walk around it in good light. Check welds, tires, loose parts, and hydraulic lines. Confirm the platform is lowered and secured.
Compare its towing capacity with the lift’s loaded weight. Check the vehicle’s tires, mirrors, and lights. Don’t guess.
Seat and lock the coupler, then fit the locking pin. Attach safety chains to their designated points. Connect the breakaway system if equipped.
Ask someone to check the brake lights, turn signals, and running lights. Test the brakes slowly in a clear area, following the manual.
Retract the platform and stow loose tools. Keep wheel chocks and required protective equipment easy to reach. Nothing should swing or fall.
Measure the lift’s full height and width, including the hitch and secured accessories. Check posted clearances for bridges, tunnels, and overhead hazards. Map estimates can be wrong.
Look for tight turns, steep grades, rough shoulders, and soft ground. Call the site contact about blocked gates, low cables, or unloading space.
Yes. Stop safely after a short distance and inspect the coupler, chains, and electrical plug. I’m tempted to skip this pause on familiar routes. Still, it’s worth a minute.
How to transport a towable lift to a job site? Start by checking the lift’s weight and dimensions against the tow vehicle’s capacity, hitch rating, and towing requirements. Before departure, inspect the lift, vehicle, hitch, tires, safety chains, and other equipment for damage or wear. Secure the lift according to its operating instructions, then confirm that the lights, brakes, and all connections work properly.
Plan a route that can accommodate the load’s height and width, and consider road conditions, tight turns, and other potential hazards. Drive cautiously and allow extra space for stopping and maneuvering. At the job site, choose firm, level ground, follow the proper unloading procedure, and position the lift securely before use. A careful inspection, suitable route, and stable setup can help make transport safer and reduce the risk of damage.

Kathy lift